Open the Spray Records page
From the home screen, find the Spray Records tile on the Grower Dashboard.
01
Log in to FodderSafe as an Grower.
02
Wait for the Home page to appear, then look for the Grower Dashboard section.
03
Click on the Spray Records tile (marked by the leaf icon).
Step 1 · Click image to zoom
Create Multiple Dates Spray Records
On the Spray Records page, kick off a new entry with the orange button.
01
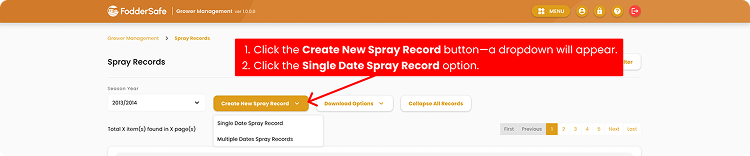
Confirm you're on the Spray Records page (notice breadcrumb at top).
02
Click the Create New Spray Record button — a dropdown will appear.
03
Click the Multiple Dates Spray Records option.
04
The 2-step wizard opens. The first step is Paddocks.
Step 2 · Click image to zoom
Select the Paddocks
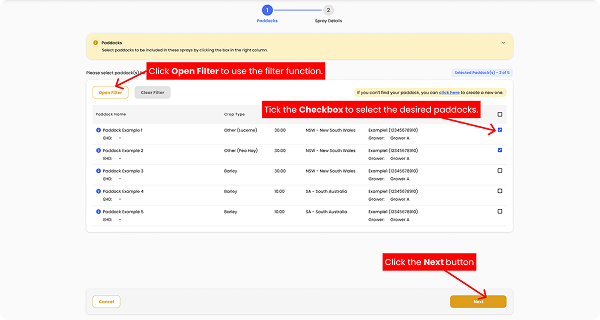
Select each paddock included in the sprays. These paddocks will later be applied to every spray date.
01
For each paddock you want to include, tick the checkbox on the right.
02
Every paddock you tick will be included in every spray date you select later.
03
Click Next to continue to Spray Details.
Bulk-select & filtering tips
- Click the checkbox in the table heading to select every paddock at once.
- Click Open Filter to narrow paddocks by specific options first.
Step 3 · Click image to zoom
Enter the Spray Date
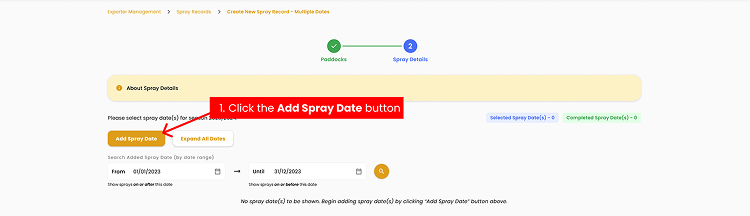
Pick the date the spray was (or will be) applied. Time is optional but useful for re-entry intervals.
01
Click Add Spray Date button — a form will appear.
02
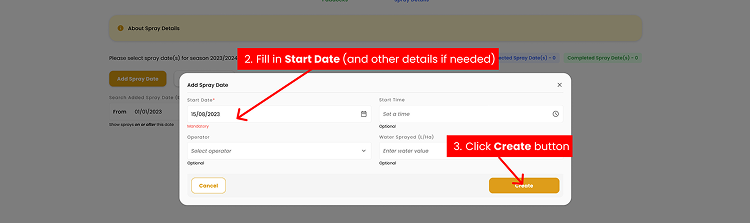
Click the Start Date field and select start date.
03
Click Create button to continue — A form will be created for each Spray Date you added.
- You can also fill other details such as Start Time, Operator, and Water Sprayed (L/Ha) if needed.
Step 4 · Click image to zoom
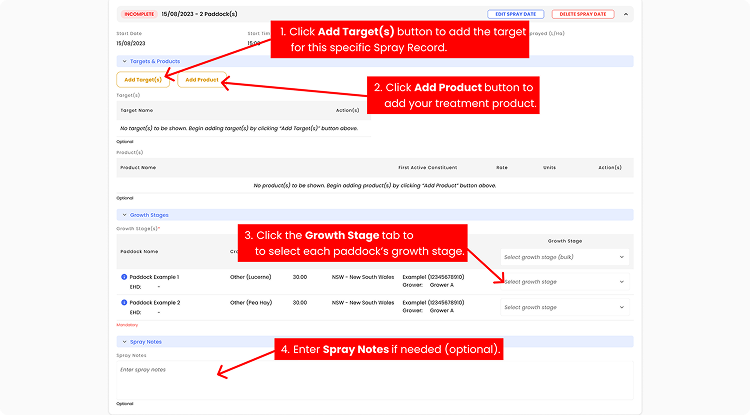
Select Targets, Products, Growth Stages, and Notes
In contrast to the Single Date Spray Record, this feature allows you to select the Target, Product, Growth Stage, and fill in the
Spray Note — all in one step.
01
Scroll down to Targets & Products section.
02
Click Add Target(s) and pick the target(s) for this specific spray record. Click Add Product and pick the product, then enter the rate and units.
03
Scroll down to Growth Stages section, you will see every paddock you’ve previously ticked.
04
Click the Growth Stage tab for each paddock and pick the phase. If all selected paddocks share one growth stage, use the bulk selector at the top of the column instead.
05
Scroll down to Notes section. Click the Notes field and type anything worth recording (Optional).
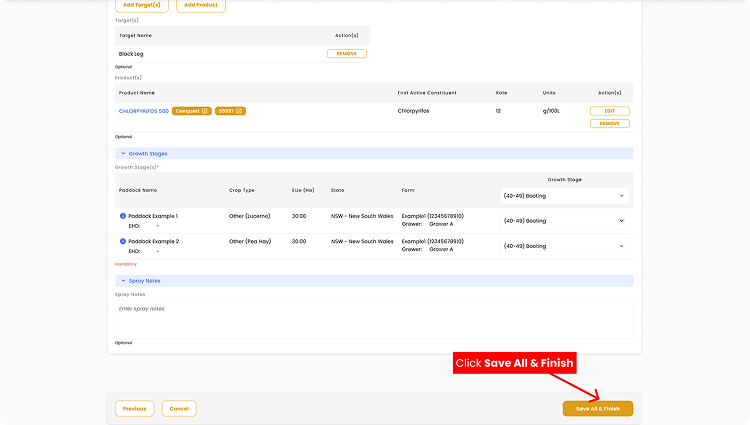
Adding Multiple Spray Dates
- You can repeat Steps 4 and 5 as many times as needed.
- Filling out the mandatory Growth Stage will automatically update the status next to the spray date from INCOMPLETE to COMPLETE.
Step 5 · Click image to zoom
Save All and Finish
After making sure everything’s correct, you're ready to finish your records.
01
Click the Save All & Finish button — your spray records are created. 🎉
Step 6 · Click image to zoom